bees
VIP Member
This is a guide on how to set up the amiko mini combo box
I am assuming you already know we need a live VM feed in order
to use the cable side and a sat dish for the sat side.
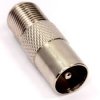
First you will need an F to Aerial connector

and a splitter if you only have a single cable coming into the house.
Connect up the box, usual manner, hdmi, ethernet, ect.
For cable screw the F to Aerial connector onto your VM feed and push into the RF in, sat feed into LNB in.
Download the firmware,
Unzip it, put it on a USB stick, put the stick in the box.
On your Remote
Menu - System - Upgrade by USB

Flash the firmware, Upgrade Mode is ALL SW + Bootloader (Right button to scroll through)

Next scan for channels
Menu - Installation - Satellite Installation
Right button to pick up Astra 28.2, either Green Button TP Scan or White Button Blind Scan will do


Menu - Installation - Cable Installation
Insert the first 4 digits of your netid into the frequency, so 50268 would become 502.6
Insert your symbol rate
flick through the QAM settings (Right button) until you get a green and yellow signal
across the bottom of the screen, either Green Button Scan or White Button Blind Scan will do


Next insert your line or lines
Menu - Internet - Net Client Config
Enter your Lines manually, make sure "active server" is green (OK button)


If you are connected you should see this
You can use, C, N or MG just make sure you have the correct protocol selected for your line
in the emulator field.

You can run Sat and Cable lines simultaneously.
Welcome back glorious HD !!!!! lol
You can post a request for a cable line here
and a sat line here
Finally, sort your channels into groups
Menu - Service - Organizing Favourites

Red Button (Group) - Satellite - Pick the Tuner you want to work on.

Press FAV button on your remote, choose a group you want to sort to.
Scroll down the left hand side, press OK and the channel will turn grey
Then when you have chosen all the channels, press the big arrow in the middle of the screen
You can use the pen icon at the bottom to rename the groups, you can also move the channels up and down the list too.

When you have sorted everything and you want to use the groups
Press OK, Red Button (group) on your remote, flick to the one you want to view

For instance The top four groups on mine all read from the cable tuner, the bottom three
read from the sat tuner
I am assuming you already know we need a live VM feed in order
to use the cable side and a sat dish for the sat side.
First you will need an F to Aerial connector

and a splitter if you only have a single cable coming into the house.
Connect up the box, usual manner, hdmi, ethernet, ect.
For cable screw the F to Aerial connector onto your VM feed and push into the RF in, sat feed into LNB in.
Download the firmware,
Unzip it, put it on a USB stick, put the stick in the box.
On your Remote
Menu - System - Upgrade by USB

Flash the firmware, Upgrade Mode is ALL SW + Bootloader (Right button to scroll through)

Next scan for channels
Menu - Installation - Satellite Installation
Right button to pick up Astra 28.2, either Green Button TP Scan or White Button Blind Scan will do


Menu - Installation - Cable Installation
Insert the first 4 digits of your netid into the frequency, so 50268 would become 502.6
Insert your symbol rate
flick through the QAM settings (Right button) until you get a green and yellow signal
across the bottom of the screen, either Green Button Scan or White Button Blind Scan will do


Next insert your line or lines
Menu - Internet - Net Client Config
Enter your Lines manually, make sure "active server" is green (OK button)


If you are connected you should see this
You can use, C, N or MG just make sure you have the correct protocol selected for your line
in the emulator field.

You can run Sat and Cable lines simultaneously.
Welcome back glorious HD !!!!! lol
You can post a request for a cable line here
and a sat line here
Finally, sort your channels into groups
Menu - Service - Organizing Favourites

Red Button (Group) - Satellite - Pick the Tuner you want to work on.

Press FAV button on your remote, choose a group you want to sort to.
Scroll down the left hand side, press OK and the channel will turn grey
Then when you have chosen all the channels, press the big arrow in the middle of the screen
You can use the pen icon at the bottom to rename the groups, you can also move the channels up and down the list too.

When you have sorted everything and you want to use the groups
Press OK, Red Button (group) on your remote, flick to the one you want to view

For instance The top four groups on mine all read from the cable tuner, the bottom three
read from the sat tuner